
Redis is available on our LiteSpeed (LSWS) network as an optional object cache. You enable it per hosting account. It does not replace LiteSpeed page cache — it sits alongside it.
This article covers starting Redis for your account, which PHP extensions to turn on, and how to point the LiteSpeed Cache WordPress plugin at your Redis socket.
What you will need
- A Spire Hosting account on LiteSpeed / Webuzo
- The LiteSpeed Cache plugin installed in WordPress (already on our WordPress hosting)
- Your hosting username (the same username as your home directory)
Your Redis socket will always look like this, with your own username:
/home/YOURUSER/.redis/redis.sock1. Enable Redis for this account
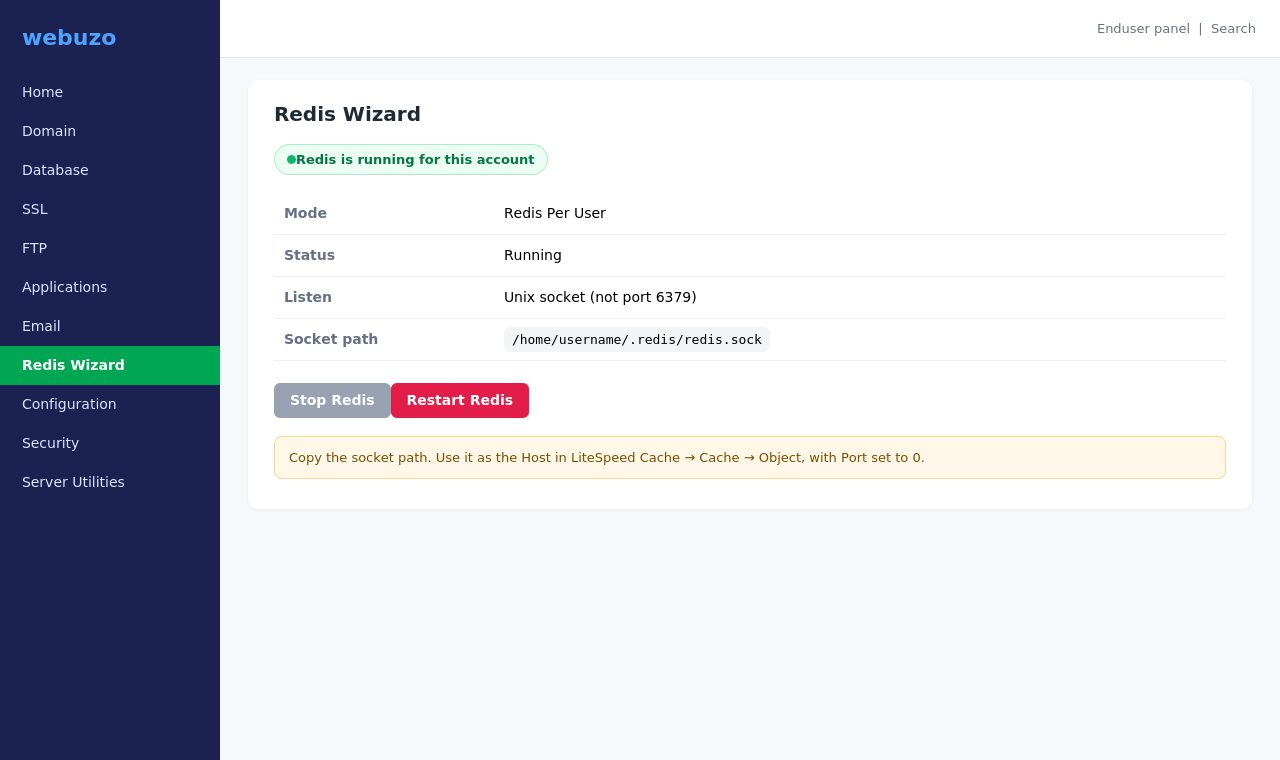
Redis is not started for every account by default. In the Webuzo end-user panel, open Redis Wizard.
- If Redis is stopped, start it.
- Confirm the mode is Redis Per User (a Unix socket, not port 6379).
- Copy the socket path shown for your account.
Do not configure applications against 127.0.0.1:6379. Shared Redis on that port is not how this platform is set up, and it is not isolated between accounts.
2. Enable the PHP extensions
PHP can only talk to Redis if the Redis module is loaded for the PHP version that site uses.
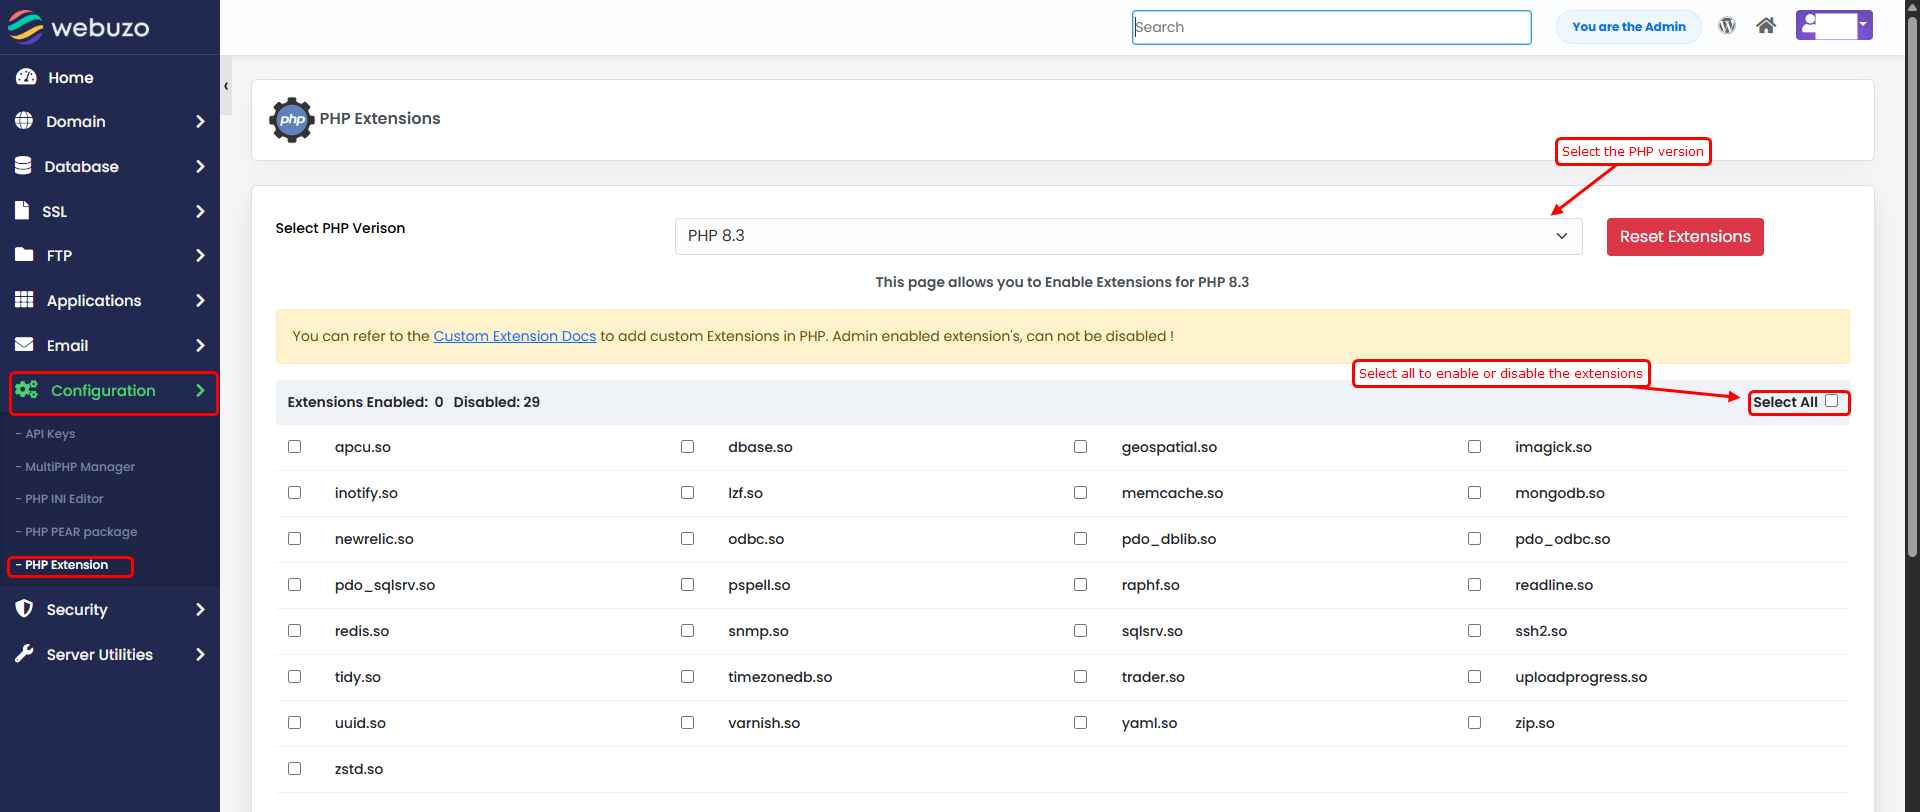
- In Webuzo go to Configuration → PHP Extension (also labelled PHP Extensions).
- Select the PHP version your site actually runs (8.1 or 8.2 is a good target). You can confirm the version in MultiPHP Manager if you are unsure.
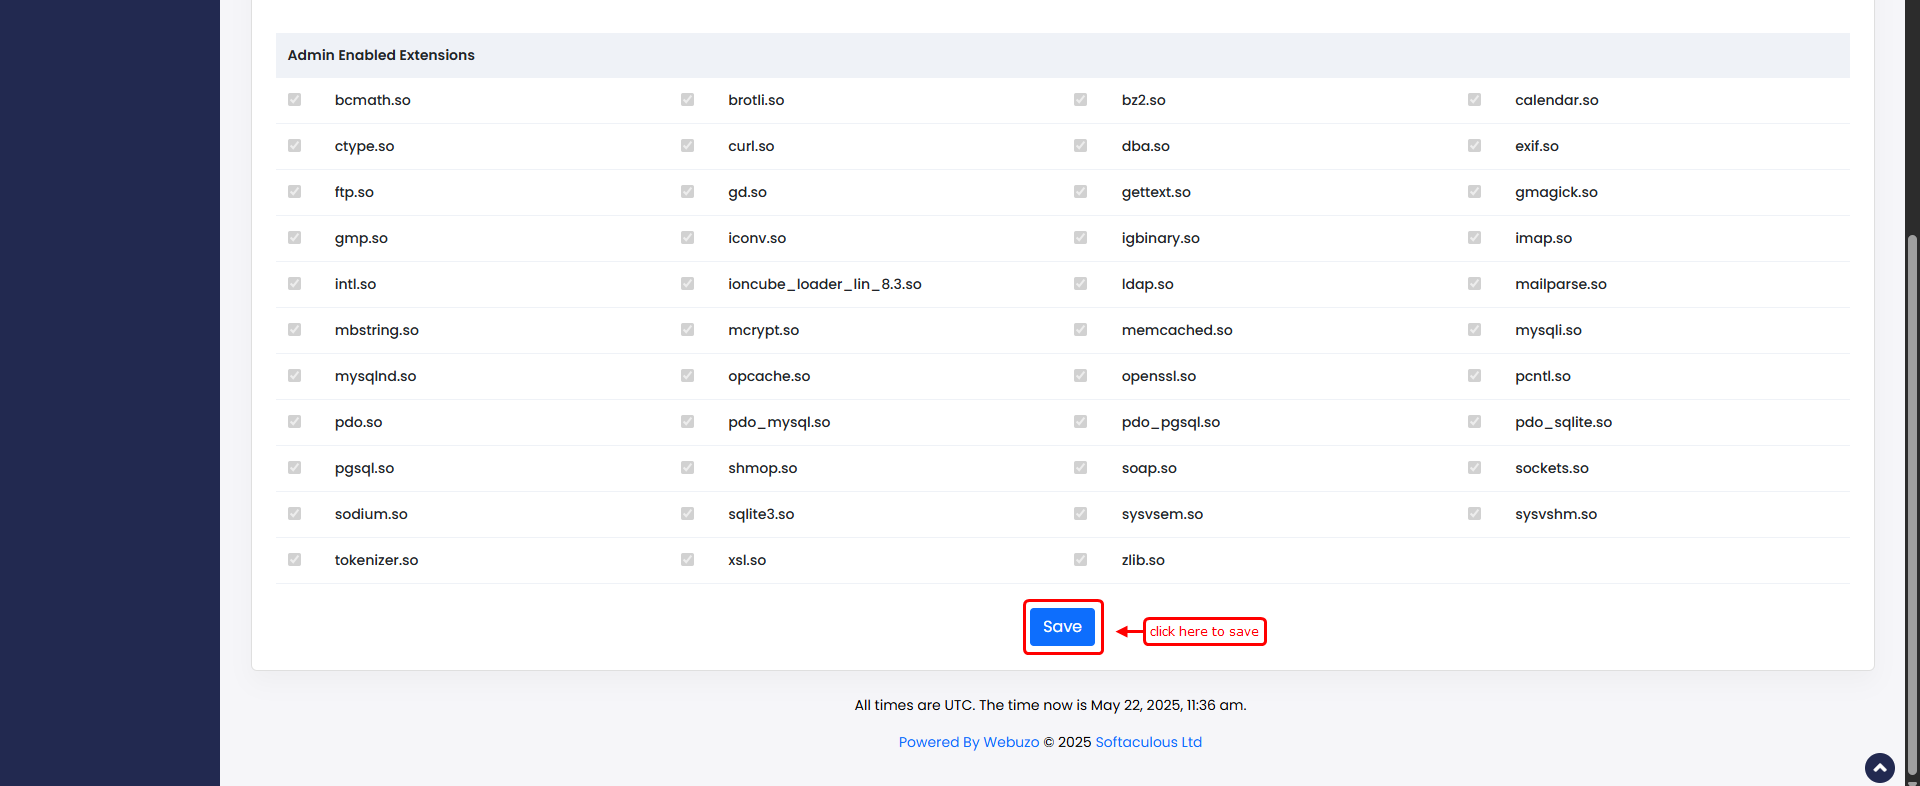
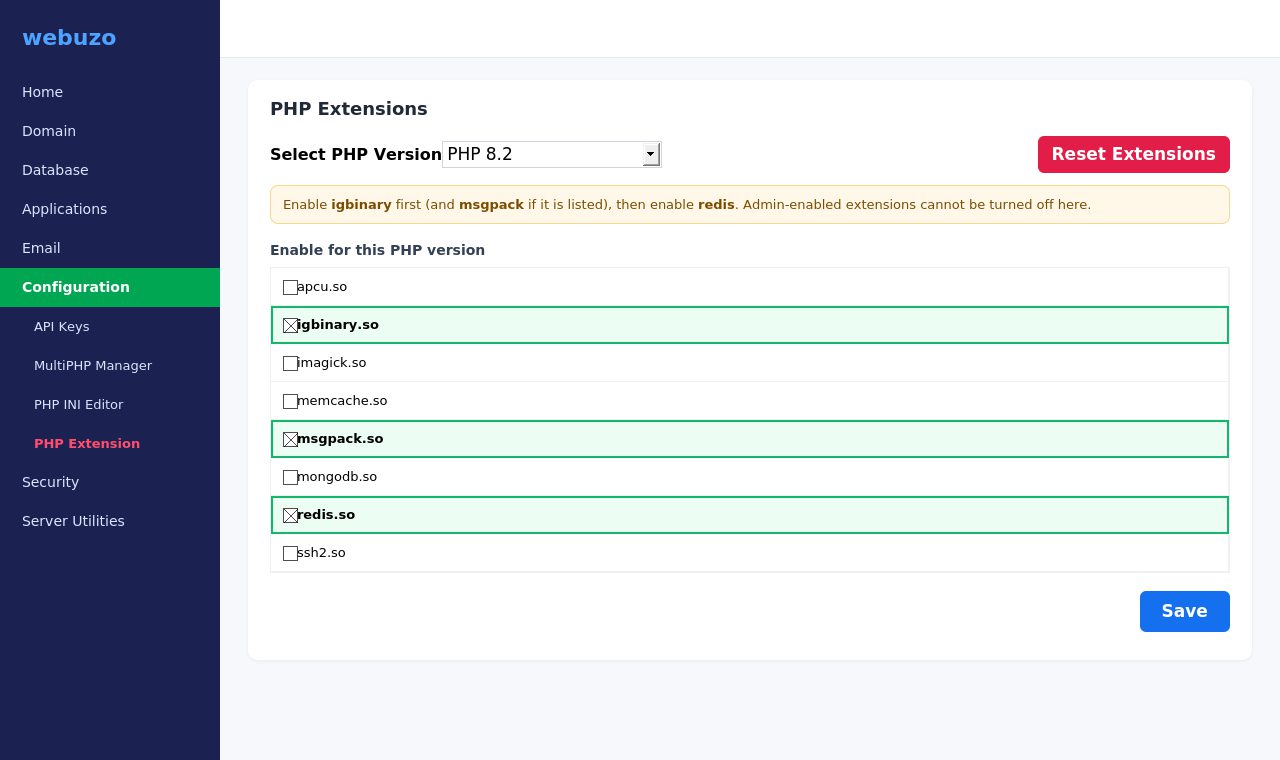
- Enable the extensions in this order, then click Save:
- igbinary — required; the Redis module is built against it. It may already be in the admin-enabled list.
- msgpack — only if it appears in the list.
- redis
If redis.so will not stay enabled, switch the site to PHP 8.1 or 8.2 in MultiPHP Manager / Select PHP Version, then reload PHP Extensions and try again.
Admin-enabled extensions cannot be turned off from the end-user panel. That is expected.
3. Point LiteSpeed Cache at Redis
In WordPress, open LiteSpeed Cache → Cache → Object.
- Set Object Cache to ON.
- Set Method to Redis.
- Set Host to
/home/YOURUSER/.redis/redis.sock(replace YOURUSER). - Set Port to
0. A Unix socket must use port 0. - Leave Username and Password blank.
- Leave Redis Database ID at
0unless you run more than one WordPress site on the same account — then give each site its own ID (1, 2, …). - Click Save Changes.
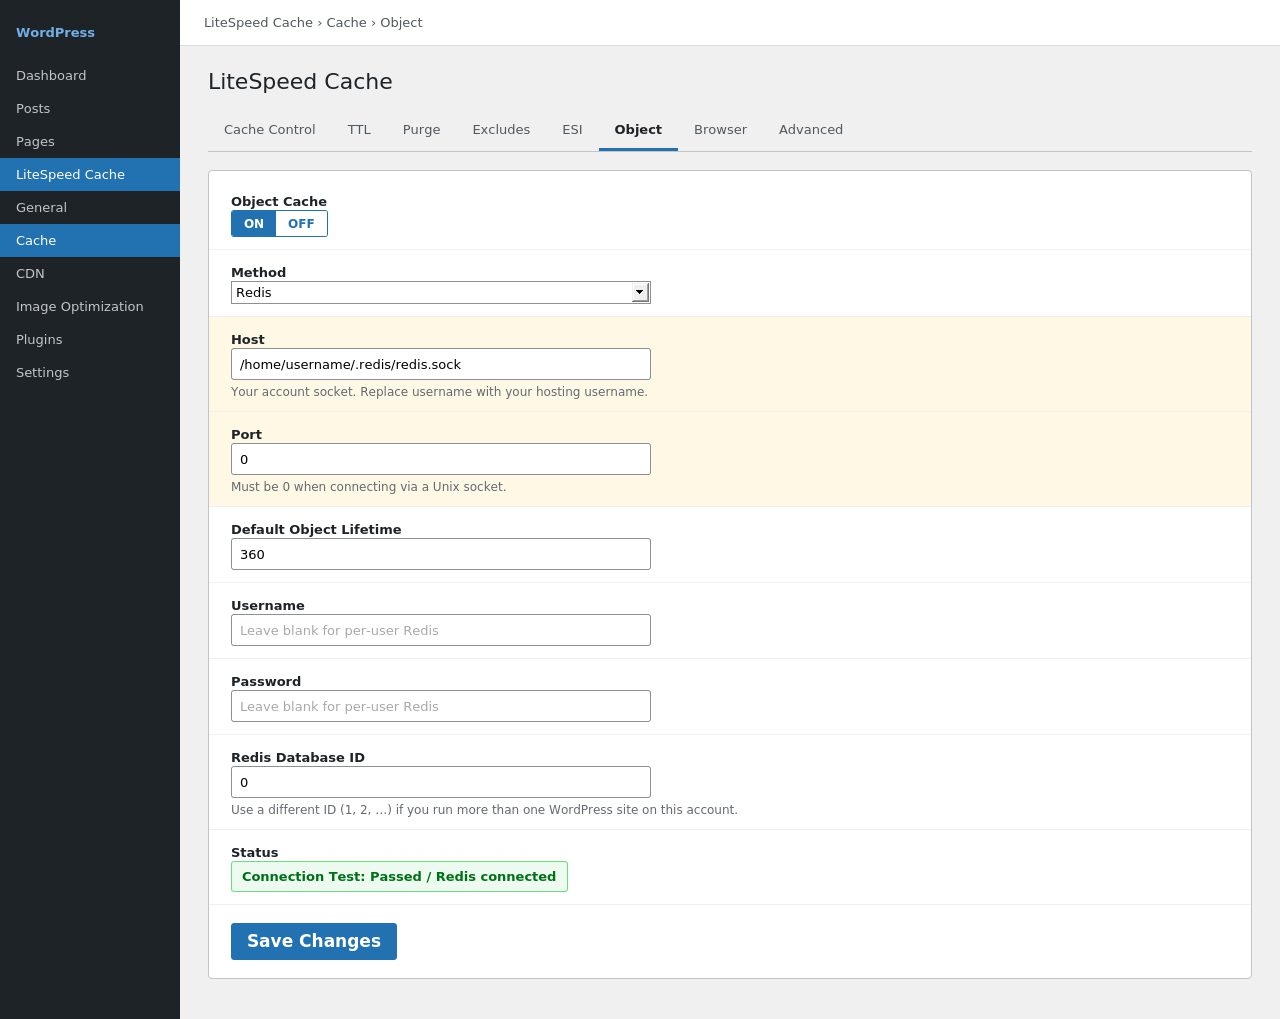
The status line should read that the connection test passed / Redis is connected. Until Redis is running and the PHP extension is loaded, this page will keep reporting that it cannot connect.
LiteSpeed Cache already drops in object-cache.php. You do not install a separate Redis object-cache plugin. Leave the LiteSpeed drop-in in place.
How this works with LiteSpeed
| Layer | What it caches | Who it helps |
|---|---|---|
| LSCache (page cache) | Finished HTML | Anonymous visitors |
| Redis (object cache) | WordPress objects / database results in RAM | Logged-in users, wp-admin, WooCommerce and other PHP-heavy requests |
Keep both on. Turning on Redis does not replace page cache, and turning on page cache does not give you object cache.
Checks if it does not connect
- Redis Wizard shows the service running for this account.
- The socket path in LiteSpeed Cache matches the Wizard, including the username.
- Port is
0, not 6379. redis(andigbinary) are enabled for the PHP version that vhost uses — not a different version.- After enabling extensions, load the Object page again. A stuck “Redis not connected” on PHP 8.0 is usually fixed by moving the site to 8.1 or 8.2.
If you would rather we enable it for you, open a support ticket and include the hosting username.